
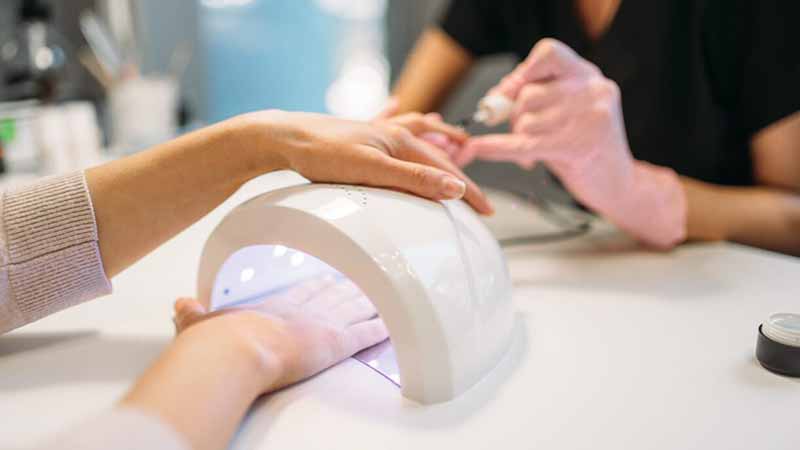
Whether you are a salon professional or a home nail enthusiast, the lamp you use to cure gel polish is arguably the most important tool in your nail supplies. The wrong lamp can leave your manicure sticky, wrinkled, or lifting within days—while the right one cures every layer evenly, giving you a glossy, chip‑free finish that lasts.
Let’s break down how UV and LED nail lamps work, how they differ, how to choose the right one, and the small details that make a big difference in your results.
How Nail Lamps Work: The Chemistry Behind the Cure
Gel polish does not dry like regular nail polish. It contains special molecules called photoinitiators that absorb ultraviolet light energy and trigger a chemical reaction called polymerization. During this reaction, the liquid monomers and oligomers in the gel link together to form a solid polymer network—much like weaving a net in real time. The lamp provides the specific wavelength and intensity of light needed to activate those photoinitiators. Without that light, the gel remains liquid forever.
Both UV and LED lamps used in nail services emit ultraviolet light, primarily in the UVA band (320–400 nm), which penetrates the gel and triggers curing. This is why you always see a purple or violet glow when the lamp is on—the visible light is a byproduct of the UV radiation.
UV Lamps vs. LED Lamps: Key Differences
At first glance, both types of lamps may look similar. But their underlying technology affects curing speed, gel compatibility, safety, and long‑term cost.
Wavelength and curing speed. Traditional UV lamps use fluorescent tubes that emit a broad spectrum of UV light (approximately 365–405 nm). This broad output cures most gel types, but it is relatively slow. Typical curing time is 2–3 minutes per layer.
LED lamps use light‑emitting diodes that emit a narrow, targeted wavelength—usually 395 nm or 405 nm. Because the light is more focused, curing is much faster, typically 30–60 seconds per layer. In some high‑power dual‑wavelength LED lamps, cure times can drop to as low as 5–10 seconds per coat.
Gel compatibility. UV lamps are compatible with almost any gel polish, including older formulations, builder gels, and hard gels. LED lamps only work with gels specifically formulated for LED curing. If you use an LED‑incompatible gel, the polish may never harden fully, leaving a sticky, uncured layer underneath the surface. Many modern gels are designed as dual‑cure (compatible with both UV and LED), but always check the manufacturer’s instructions.
Light spectrum and safety. All nail lamps emit UVA radiation. However, LED lamps emit a narrower, more controlled spectrum and generally produce less UVA than traditional UV fluorescent tubes. UV fluorescent bulbs also generate significant heat—temperatures can reach 50–70 °C—which can cause discomfort or even burns if the lamp is touched. LED lamps are cold‑light sources, staying much cooler during use.
Lifespan and maintenance. UV fluorescent bulbs degrade over time. After approximately 2,000 hours of use, their output may drop by 10–15%, which can lead to incomplete curing even if the lamp still lights up. Replacement bulbs are needed every few months. LED bulbs, in contrast, are rated for tens of thousands of hours and rarely need replacing. This makes LED lamps more energy‑efficient and lower‑maintenance in the long run, despite their higher upfront cost.
Initial cost. Standard UV lamps are generally less expensive to purchase. However, the ongoing cost of replacement bulbs and higher energy consumption can add up over time. High‑quality LED lamps have a higher purchase price but save money in the long term.
How to Choose the Right Nail Lamp
With so many options on the market, selecting the right lamp depends on your needs, your gel products, and your budget.
Check your gel brand’s recommendations first. This is the single most important step. Reputable gel manufacturers test their products with specific lamps and publish compatibility guidelines for a reason. Using a budget lamp with a professional‑grade gel is one of the most common sources of curing problems at home. If you are already committed to a particular brand of gel, buying that brand‘s recommended lamp ensures that the wavelength and illuminance are matched to the photoinitiators in the product.
Prioritize dual‑wavelength (365 nm + 405 nm). Different gel formulations use different photoinitiators. Some respond best to 365 nm; others to 405 nm. A dual‑wavelength lamp contains two sets of LEDs, emitting both bands simultaneously. This “dual‑key” design covers the vast majority of gels on the market, greatly reducing the risk of wavelength mismatch.
Look at illuminance, not just wattage. Many manufacturers market lamps by wattage (e.g., 36W, 48W, 120W). But wattage only tells you how much electricity the lamp consumes, not how much UV light actually reaches your nail. What matters is UV illuminance—the amount of UV light energy landing on the nail surface, measured in milliwatts per square centimeter (mW/cm²). A higher wattage lamp can still cure poorly if its light is not concentrated, reflected, or directed properly. For consistent curing, look for lamps with well‑designed reflective interiors (such as aluminum or mirror coatings) that distribute light evenly across all five fingers.
Consider lamp design and coverage. The number and placement of LEDs matter as much as their power. Standard tabletop lamps should have at least 6–8 LEDs, spaced to cover the entire nail bed without “dead zones”. Low‑end portable lamps with only 2–4 LEDs often fail to cure edges and sidewalls, leading to lifting and peeling. For home use, a 36 W–48 W LED lamp with a large curing chamber is a reliable starting point. For professional salon use, higher wattage models with advanced light reflection systems are available.
Do not rely on handheld or “linear” lamps as your main lamp. Handheld LED lamps (often called “pin lamps” or “linear lamps”) are designed for spot curing—fixing a lifted edge, tacking down a nail tip, or curing a single finger during nail art. They are not intended to cure a full set of five fingers at once. Using a handheld lamp as your primary curing tool often results in under‑cured edges, yellowing, and poor adhesion. Reserve portable lamps for travel or emergency touch‑ups only.
Important Usage Details to Avoid Common Problems
Even a high‑quality lamp can produce poor results if used incorrectly. Follow these practical tips to ensure your gel manicure cures properly every time.
Position your fingers correctly. Rest your hand so that all five nails are flat and fully exposed to the light. For thumbs, you may need to cure them separately, either by rotating your hand or using the lamp‘s side openings. Poor finger placement is one of the most overlooked causes of under‑cured edges.
Keep the correct distance. Hold your fingers 2–3 cm from the LEDs. Too close can cause overheating and a burning sensation; too far reduces curing efficiency.
Use sufficient curing time. Even with a fast LED lamp, do not rush. Many professionals use 60 seconds per layer for thicker gels or dark colors, even if the lamp’s auto‑timer suggests less time.
Never move your hand during curing. Gel polish cures in place. Any movement, no matter how small, can cause wrinkling, uneven thickness, or peeling.
Watch for lamp degradation. UV bulbs degrade invisibly. If your UV lamp takes longer to cure gels than it used to, or if gels feel soft or sticky after the usual time, replace the bulbs. For LED lamps, degradation is slower, but even the best LEDs eventually lose output. After 2–3 years of regular use, consider testing your lamp with a UV meter or replacing it.
Avoid curing thick layers. Gel polish should always be applied in thin, even coats. Thick layers prevent light from penetrating fully, leaving the lower portion uncured and creating a soft, weak base that will lift within days.
Protect your skin. All nail lamps emit UVA radiation. While the risk from occasional home use is considered low, cumulative exposure adds up over time. To protect your hands:
- Apply a broad‑spectrum sunscreen (SPF 30 or higher) to your hands before curing, avoiding the nail plates.
- Wear UV‑protective fingerless gloves.
- Look for lamps with built‑in UV shielding or automated sensors that turn off when hands are removed.
- Check for mandatory light radiation safety risk labels on newer lamps under new safety regulations.
The Bottom Line
Nail lamps are not one‑size‑fits‑all. A UV lamp offers broad compatibility with older gel formulas but is slower and requires regular bulb changes. An LED lamp is faster, cooler, and lower‑maintenance but only works with LED‑compatible gels. For the best balance of performance and versatility, choose a dual‑wavelength (365 nm + 405 nm) LED lamp with good light distribution, match your gel to the manufacturer’s lamp recommendations, and never compromise on proper usage—correct finger placement, thin layers, and adequate curing time are what separate a flawless manicure from one that fails in days.
Do you have a favorite nail lamp or a curing tip that transformed your gel manicure? Share it in the comments—I‘d love to hear what works for you.
Read also: When and How to Safely Remove Builder Gel: A Step-by-Step Guide

One thought on “The Science of Nail Lamps: UV vs. LED, How to Choose, and What to Watch For”